GeoMesa FileSystem on Microsoft Azure
GeoMesa FileSystem can be used on top of Azure Blob storage, with Apache Spark analytics running using ephemeral (temporary) Azure Batch clusters. This mode of running GeoMesa is cost-effective due to the separation of storage (relatively cheap) and compute (relatively expensive, but only charged when required). The following guide describes how to set up an Azure Batch cluster, ingest some data, then analyse it using Spark (Scala) in a Jupyter notebook.
Prerequisites
You will need a Microsoft Azure account with sufficient credit or an appropriate payment method. As a guide, running the steps in this tutorial should cost no more than $5. If you don’t already have an account, you can sign up for a free trial here.
Installing & Configuring Azure Distributed Data Engineering Toolkit
This guide uses the Azure Distributed Data Engineering Toolkit (AZTK) in order to set up an ephemeral cluster. Alternatively, you may wish to deploy a more permanent Azure HDInsight cluster. This latter option is not covered here, but much of the subsequent operations will be common.
Follow the AZTK instructions to install AZTK.
Warning
Make sure you pick the correct branch of the documentation to match the latest release (not main).
Note
It is recommended to install AZTK in an Anaconda environment, or a Python virtual environment.
In summary, to install AZTK:
pip install aztkIn a directory of your choosing,
aztk spark initUse Azure Cloud Shell and the
account_setup.shscript to generate the contents of.aztk/secrets.yamlfor you. Alternatively, you can create the necessary Resource Groups, Batch Accounts, Storage Accounts, etc. manually.Optionally, generate a ssh key pair and reference the public key from
.aztk/secrets.yaml.
Note
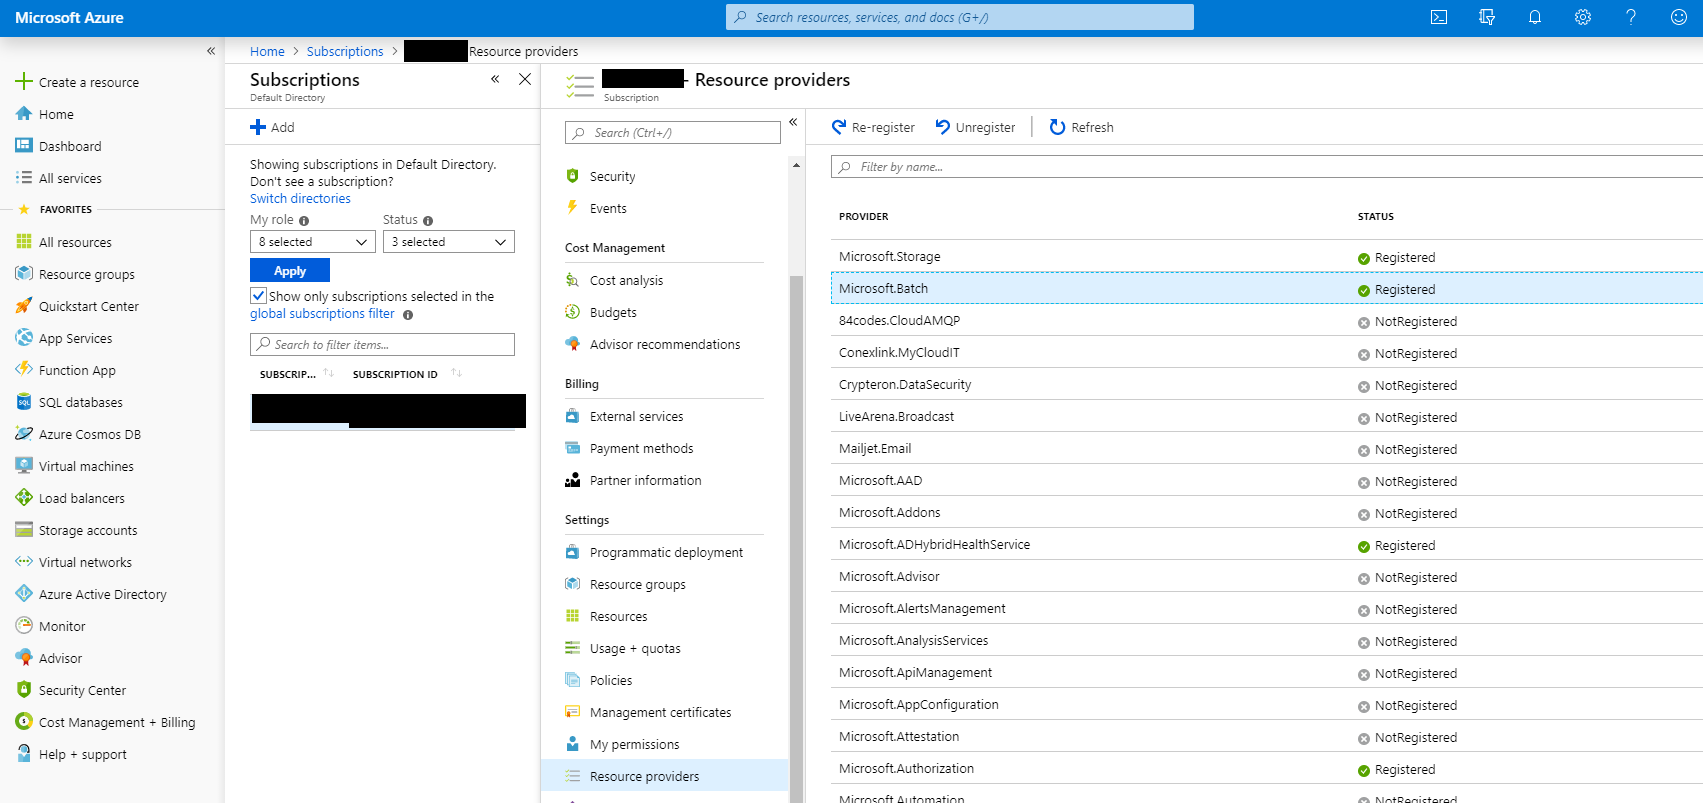
You may need to register the Microsoft.Batch provider in your Azure account. Check in the
Azure Portal under Subscriptions…Subscription Name…Settings…Resource providers.

Microsoft Azure Resource Providers
Warning
Your secrets.yaml file now contains sensitive data and should be protected accordingly.
Customise Cluster Default Configuration
Edit .aztk/cluster.yaml as follows:
Comment out the
size:line. We will specify the cluster size on the command line and specifying the size here will cause issues with mixed normal and low priority nodes unless additional network configuration is performed (beyond the scope of this guide, but covered here).Set
environment: anaconda.Ensure the
jupyterplugin is not enabled (we will manually install Jupyter later so we can add Spark Scala support).Set
worker_on_mastertofalseto disable running Apache Spark executors on the master itself.
Customise Hadoop Cluster Configuration
Add the following lines to .aztk/core-site.xml to enable Hadoop access to your Azure Blob Storage account via the
secure (wasbs) protocol. Replace [storage account name] and [key] with the appropriate values.
<property>
    <name>fs.AbstractFileSystem.wasbs.impl</name>
    <value>org.apache.hadoop.fs.azure.Wasbs</value>
</property>

<property>
    <name>fs.wasbs.impl</name>
    <value>org.apache.hadoop.fs.azure.NativeAzureFileSystem</value>
</property>

<property>
    <name>fs.azure.account.key.[storage account name].blob.core.windows.net</name>
    <value>[key]</value>
</property>
Warning
Your core-site.xml file now contains sensitive data and should be protected accordingly.
Create a Apache Spark Cluster for Ingest
We will first create a minimal Apache Spark cluster and use the master to download and ingest some data:
aztk spark cluster create --id geomesa --vm-size standard_f2 --size-low-priority 2 --docker-run-options="--privileged"
This should start the creation of a cluster using low priority (i.e. cheaper) nodes. The cluster is deployed as a Docker
container on each node; --privileged is required in order to be able to mount the Azure Files share you have just
created.
If you aren’t using ssh keys, you will be prompted to enter a password for the spark user. You can monitor cluster
creation progress using aztk spark cluster list & aztk spark cluster get --id geomesa. You can also monitor
cluster creation and status using Batch Explorer.
The cluster is ready when all nodes are shown in the idle state, which usually takes 5-10 minutes:
aztk spark cluster get --id geomesa

Cluster         geomesa
------------------------------------------
State:          steady
Node Size:      standard_f2
Created:        2019-08-30 15:07:36
Nodes:          2
| Dedicated:    0
| Low priority: 2

|               Nodes                |        State        |        IP:Port       | Dedicated  |  Master  |
|------------------------------------|---------------------|----------------------|------------|----------|
|tvmps_b2e6b9f170b73fe9f993d3e0f1cd2a40cd49041b54dfbf9774fbc07b2c883b03_p|        idle         |  51.105.13.125:50001 |            |    *     |
|tvmps_cfd27f38197a963a04cb8363d6012067fd1d38ecb4fa86a406f89ed3e8f57154_p|        idle         |  51.105.13.125:50000 |            |          |
Connect to the Cluster
Usually you would use aztk spark cluster ssh in order to connect to the cluster, forwarding useful ports for the
various services over ssh. However, we will need to add a port forward for Jupyter, so instead perform the following:
aztk spark cluster ssh --id geomesa -u spark --no-connect

-------------------------------------------
spark cluster id:              geomesa
open webui:                    http://localhost:8080
open jobui:                    http://localhost:4040
open jobhistoryui:             http://localhost:18080
ssh username:                  spark
connect:                       False
-------------------------------------------

Use the following command to connect to your spark head node:
      ssh -L 8080:localhost:8080 -L 4040:localhost:4040 -L 18080:localhost:18080 -t spark@51.105.13.125 -p 50001 'sudo docker exec -it spark /bin/bash'
Use the provided command to connect to your cluster, with the following changes:
Add
-L 8888:localhost:8888in order to additionally port forward Jupyter(Windows only, when using
cmd.exe) remove the single quotes around thesudo docker...command.
After entering your private key passphrase or the password you set for the spark user, you should get a root shell
inside the Docker container running Apache Spark.
root@883aa5f49ee64425964d1eb085366173000001:/#
Note
Unless specified otherwise, all subsequent commands should be run inside this container.
Install & Configure GeoMesa Filesystem CLI
In order to ingest data, we will first need to install and configure the GeoMesa Filesystem CLI tool. Replace
${VERSION} with the GeoMesa and Scala versions used (e.g. 2.12-5.2.2):
cd /mnt/geomesa
wget https://github.com/locationtech/geomesa/releases/download/geomesa_${VERSION}/geomesa-fs_${VERSION}-bin.tar.gz
tar -xzvf geomesa-fs_${VERSION}-bin.tar.gz
Note
You may need to update the GeoMesa version in order to match the latest release.
In order to use GeoMesa Filesystem on Azure Blob Storage, you will need to copy the following JARs and also set the
Hadoop configuration directory environment variable so your core-site.xml file is picked up.
cd /home/spark-current/jars
cp azure-storage-2.2.0.jar \
   commons-configuration-1.6.jar \
   commons-logging-1.1.3.jar \
   guava-11.0.2.jar \
   hadoop-auth-2.8.3.jar \
   hadoop-azure-2.8.3.jar \
   hadoop-common-2.8.3.jar \
   hadoop-hdfs-client-2.8.3.jar \
   htrace-core4-4.0.1-incubating.jar \
   jetty-util-6.1.26.jar \
   /mnt/geomesa/geomesa-fs_${VERSION}/lib
export HADOOP_CONF_DIR=/home/spark-current/conf
Ingest Data into Azure Blob Storage
We will first download 2.6 GB of compressed data from Marine Cadastre. This file contains approx 70 million records of ships beaconing their position using AIS in the Gulf of Mexico in July 2017. Much more data is available from Marine Cadastre, as well as numerous commercial suppliers.
cd /mnt/geomesa
mkdir data
cd data
wget https://coast.noaa.gov/htdata/CMSP/AISDataHandler/2017/AIS_2017_07_Zone15.zip
Optional: We can test the converter as follows.
cd /mnt/geomesa/geomesa-fs_${VERSION}/bin
./geomesa-fs convert \
  --spec marinecadastre-ais-csv \
  --converter marinecadastre-ais-csv \
  --max-features 10 \
  ../../data/AIS_2017_07_Zone15.zip
Note
When writing your own converters, it is highly recommended to use the convert command for iterative testing prior
to ingest.
Next, we can ingest the data as follows:
./geomesa-fs ingest \
  --path wasbs://<blob container name>@<storage account>.blob.core.windows.net/<path> \
  --encoding orc \
  --partition-scheme daily,z2-20bits \
  --spec marinecadastre-ais-csv \
  --converter marinecadastre-ais-csv \
  ../../data/AIS_2017_07_Zone15.zip
You should replace <blob container name>, <storage account> and <path> with the appropriate values for your
environment.
Note
Since our data is very concentrated in a particular area, we use a large number of bits for the z2 index.
In a more realistic situation, index precision is a tradeoff between reading large blocks of data from storage
(favouring lower precision) and minimising the number of discrete files or blobs accesses (favouring higher
precision). This will depend on your data distribution and access/query patterns.
Install Jupyter, GeoMesa Jupyter Leaflet & Apache Toree
Having created our Apache Spark cluster & ingested some data, we are almost ready to run some analytics. We will use the Jupyter notebook platform together with the Apache Toree kernel for Apache Spark to perform interactive scalable analysis. In order to visualise our results, we will use the GeoMesa Jupyter Leaflet integration.
Optional: Having used a minimal cluster for ingest, you may now wish to use more nodes to increase performance and the
size of datasets that can be analysed. If so, delete your existing cluster (aztk spark cluster delete --id=geomesa)
and create a new one as previously, increasing the number of nodes (--size and/or --size-low-priority) and/or
individual node size (--vm-size). Remember to remount the Azure Files share and export HADOOP_CONF_DIR.
Back inside the Apache Spark container on your master node run the following:
cd /mnt/geomesa
pip install toree
wget https://repo1.maven.org/maven2/org/locationtech/geomesa/geomesa-spark-jupyter-leaflet_2.12/${VERSION}/geomesa-spark-jupyter-leaflet_${VERSION}.jar
jupyter toree install \
  --spark_home=/home/spark-current \
  --replace \
  --spark_opts="--master spark://`hostname -i`:7077 --num-executors 2 --conf spark.dynamicAllocation.enabled=false --jars /mnt/geomesa/geomesa-fs_${VERSION}/dist/spark/geomesa-fs-spark-runtime_${VERSION}.jar,/mnt/geomesa/geomesa-spark-jupyter-leaflet_${VERSION}.jar"
If you have increased the size of your cluster, you should also increase --num-executors accordingly. You can also
set other executor and driver options by editing the spark_opts contents.
Running Jupyter and opening Notebooks
Finally, we will clone the tutorial repository in order to obtain our sample notebook, then launch Jupyter:
git clone https://github.com/geomesa/geomesa-tutorials
jupyter notebook --allow-root &
Warning
You may need to check out the appropriate tag of the geomesa-tutorials repository in order to match your GeoMesa
Filesystem release.
Then open the URL provided by Jupyter on your local machine, including the long token. Navigate to
geomesa-fs-on-azure and open GeoMesa FileSystem on Azure.ipynb. Work through the notebook at your own pace.

Jupyter notebook showing GeoMesa Leaflet integration
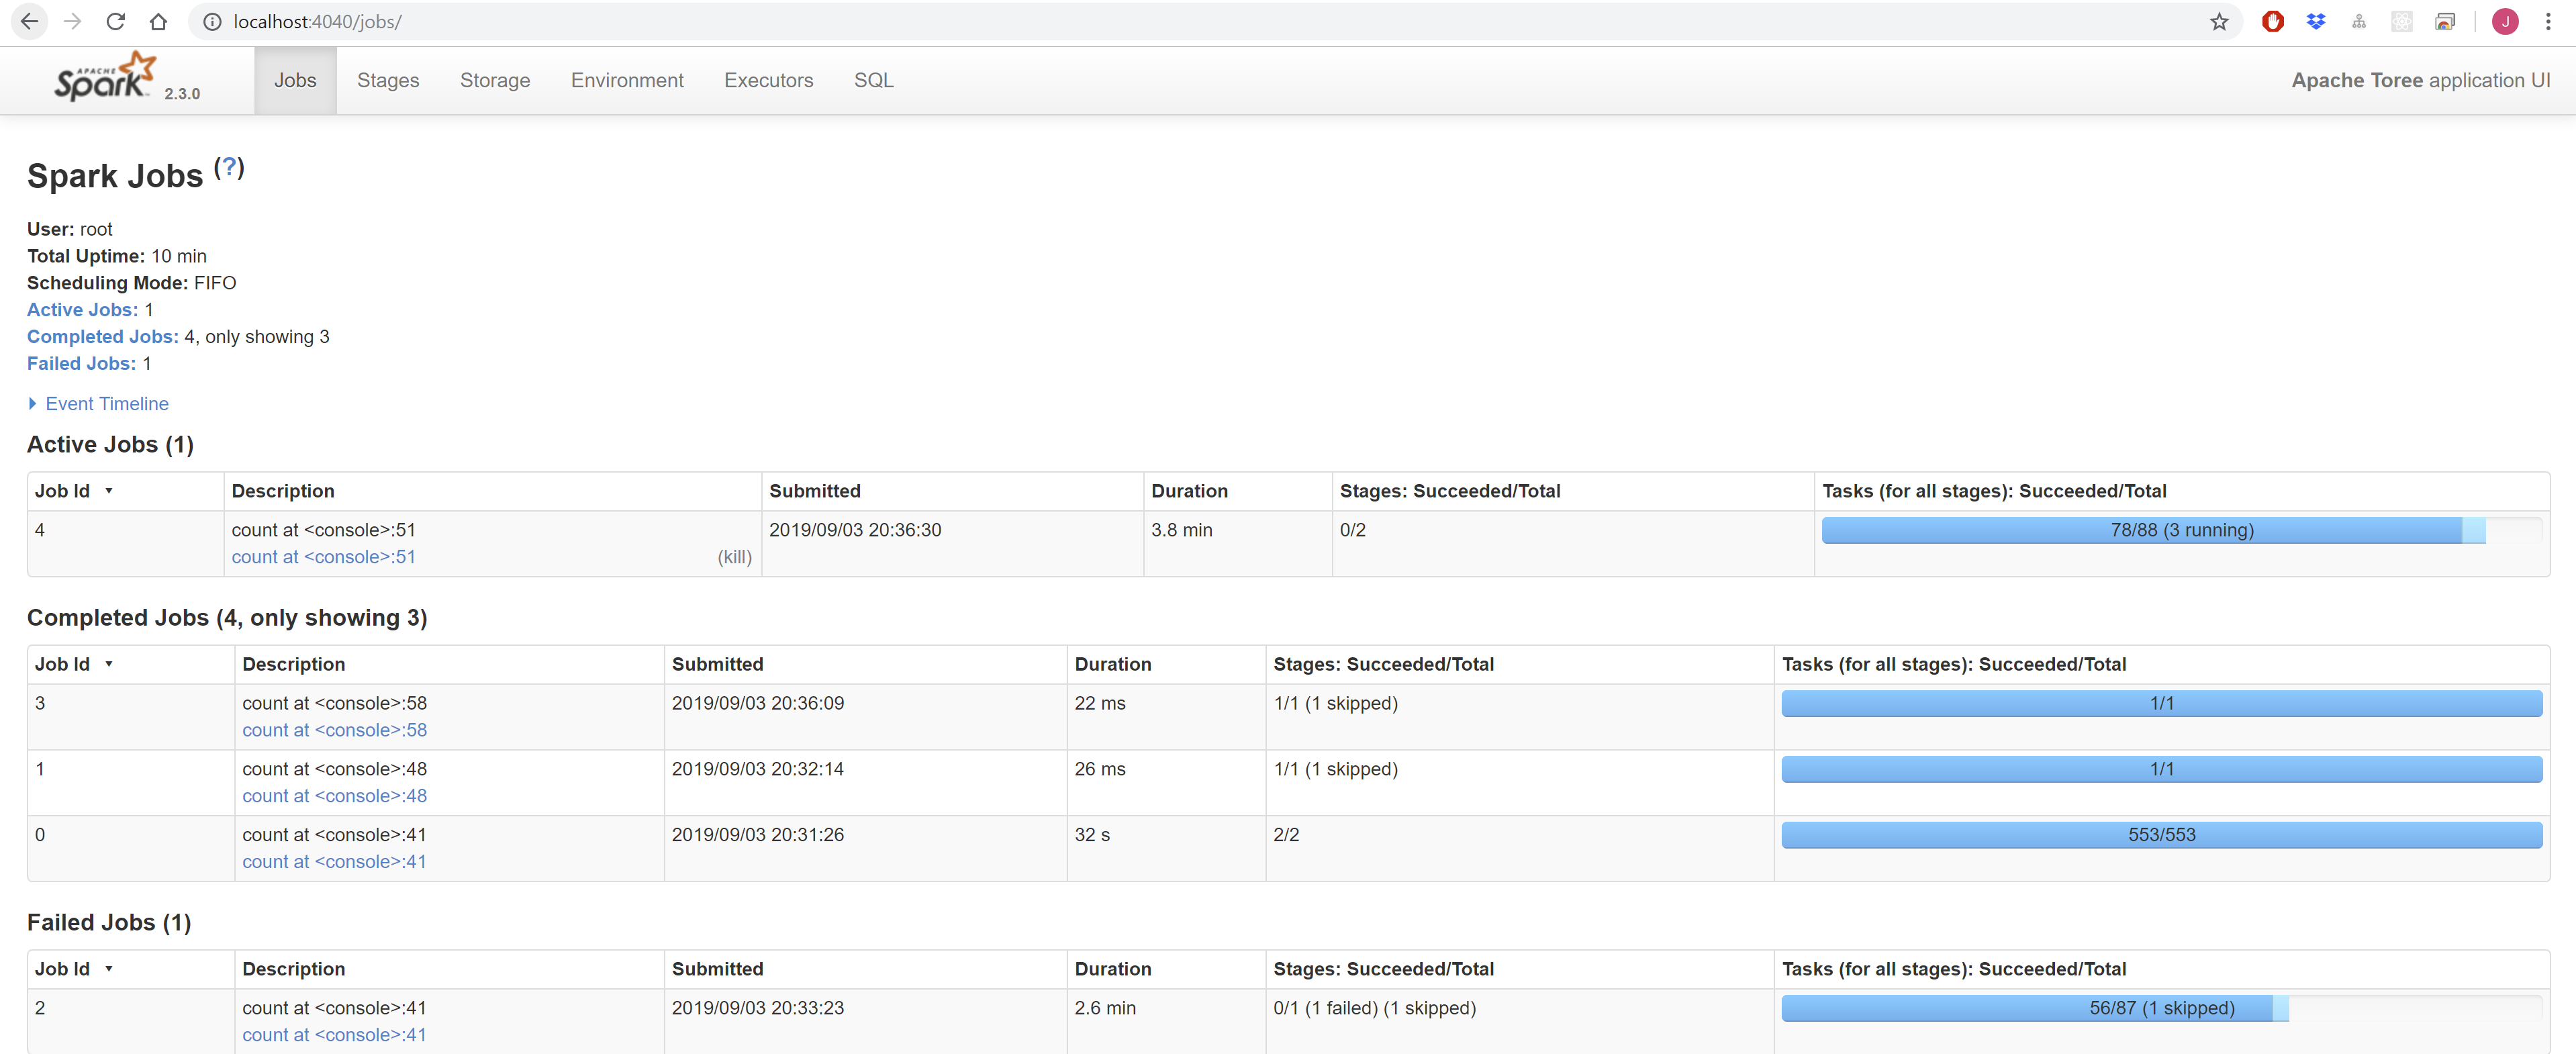
You can access the Apache Spark Master interface via http://localhost:8080, and the Apache Spark Jobs interface via http://localhost:4040.

Apache Spark Master UI

Apache Spark Jobs UI
Deleting your Ephemeral Cluster
It is important to remember to delete your Azure Batch cluster once you have finished with it, otherwise you will incur unexpected charges.
aztk spark cluster delete --id=geomesa