GeoMesa HBase Quick Start
This tutorial is the fastest and easiest way to get started with the HBase support in GeoMesa. In the spirit of keeping things simple, the code in this tutorial only does a few things:
- Establishes a new (static)
SimpleFeatureType - Prepares the HBase table to store this type of data
- Creates 1000 example SimpleFeatures
- Writes these SimpleFeatures to the HBase table
- Queries for a given geographic rectangle and time range, and attribute filter, and writes out the entries in the result set
Prerequisites
Before you begin, you must have the following installed and configured:
- Java Development Kit 1.8,
- Apache Maven,
- a GitHub client,
- HBase 1.2.x (optional), and
- GeoServer 2.9.1 (optional).
An existing HBase 1.1.x installation is helpful but not necessary. The tutorial described will work either with an existing HBase server or by downloading the HBase binary distribution and running it in “standalone” mode (described below).
GeoServer is only required for visualizing the HBase data. Setting up GeoServer is beyond the scope of this tutorial.
Setting up HBase in standalone mode (optional)
(Skip this section if you have an existing HBase 1.1.x installation.)
Download the HBase 1.2.3 binary distribution from http://www.apache.org/dyn/closer.cgi/hbase/
Follow the chapter in the HBase Manual for running a standalone instance of HBase (https://hbase.apache.org/book.html#quickstart). Note that this will use the local filesystem instead of HDFS, and will spin up its own instances of HBase and Zookeeper.
Download and build the tutorial
Clone the geomesa-tutorials distribution from GitHub:
$ git clone https://github.com/geomesa/geomesa-tutorials.git
$ cd geomesa-tutorials
Note
You may need to download a particular release of the tutorials project to target a particular GeoMesa release. See About Tutorial Versions.
The pom.xml file contains an explicit list of dependent libraries
that will be bundled together into the final tutorial. You should
confirm that the versions of HBase and Hadoop match what you are
running; if it does not match, change the values of the
hbase.version and hbase.hadoop.version properties. The version
of GeoMesa that this tutorial targets matches the project version of the
pom.xml. (Note that this tutorial has been tested with GeoMesa 1.2.2
or later).
Note
The only reason these libraries are bundled into the
final JAR is that this is easier for most people to do this than it
is to set the classpath when running the tutorial. If you would
rather not bundle these dependencies, mark them as provided in
the POM, and update your classpath as appropriate.
GeoMesa’s HBaseDataStore searches for a file called
hbase-site.xml, which among other things configures the Zookeeper
host(s) and port. If this file is not present on the classpath, the
hbase-default.xml provided by hbase-common sets the default
zookeeper quorum to “localhost” and port to 2181, which is what is used
by the standalone HBase described in “Setting up HBase in standalone
mode” above. If you have an existing HBase installation, you should copy
your hbase-site.xml file into
geomesa-quickstart-hbase/src/main/resources (or otherwise add it to
the classpath when you run the tutorial).
To build the tutorial code:
$ cd geomesa-quickstart-hbase
$ mvn clean install
When this is complete, it should have built a JAR file that contains all of the code you need to run the tutorial.
Running the tutorial
On the command line, run:
$ java -cp target/geomesa-quickstart-hbase-$VERSION.jar \
  com.example.geomesa.hbase.HBaseQuickStart \
  --bigtable_table_name geomesa
The only argument passed is the name of the HBase table where GeoMesa
will store the feature type information. It will also create a table
called <tablename>_<featuretype>_z3 which will store the Z3-indexed
features.
You should see output similar to the following (not including some of Maven’s output and log4j’s warnings), which lists the features that match the specified query in the tutorial do
Creating feature-type (schema):  QuickStart
Creating new features
Inserting new features
Submitting query
1.  Bierce|676|Fri Jul 18 08:22:03 EDT 2014|POINT (-78.08495724535888 37.590866849120395)|null
2.  Bierce|190|Sat Jul 26 19:06:19 EDT 2014|POINT (-78.1159944062711 37.64226959044015)|null
3.  Bierce|550|Mon Aug 04 08:27:52 EDT 2014|POINT (-78.01884511971093 37.68814732634964)|null
4.  Bierce|307|Tue Sep 09 11:23:22 EDT 2014|POINT (-78.18782181976381 37.6444865782879)|null
5.  Bierce|781|Wed Sep 10 01:14:16 EDT 2014|POINT (-78.0250604717695 37.58285696304815)|null
To see how the data is stored in HBase, use the HBase shell.
$ /path/to/hbase-1.2.3/bin/hbase shell
The type information is in the geomesa table (or whatever name you
specified on the command line):
hbase> scan 'geomesa'
ROW                              COLUMN+CELL
 QuickStart                      column=M:schema, timestamp=1463593804724, value=Who:String,What:Long,When:Date,*Where:Point:s
                                 rid=4326,Why:String
The features are stored in <tablename>_<featuretype>_z3
(geomesa_QuickStart_z3 in this example):
hbase> scan 'geomesa_QuickStart_z3', { LIMIT => 3 }
ROW                              COLUMN+CELL
 \x08\xF7\x0F#\x83\x91\xAE\xA2\x column=D:\x0F#\x83\x91\xAE\xA2\xA8PObservation.452, timestamp=1463593805801, value=\x02\x00\x
 A8P                             00\x00@Observation.45\xB2Clemen\xF3\x01\x00\x00\x00\x00\x00\x00\x01\xC4\x01\x00\x00\x01CM8\x0
                                 E\xA0\x01\x01\xC0S!\x93\xBCSg\x00\xC0CG\xBF$\x0DO\x7F\x80\x14\x1B$-?
 \x08\xF8\x06\x03\x19\xDFf\xA3p\ column=D:\x06\x03\x19\xDFf\xA3p\x0CObservation.362, timestamp=1463593805680, value=\x02\x00\x
 x0C                             00\x00@Observation.36\xB2Clemen\xF3\x01\x00\x00\x00\x00\x00\x00\x01j\x01\x00\x00\x01CQ\x17wh\
                                 x01\x01\xC0S\x05\xA5b\xD49"\xC0B\x88*~\xD1\xA0}\x80\x14\x1B$-?
 \x08\xF8\x06\x07\x19S\xD0\xA21> column=D:\x06\x07\x19S\xD0\xA21>Observation.35, timestamp=1463593805664, value=\x02\x00\x00\x
                                 00?Observation.3\xB5Clemen\xF3\x01\x00\x00\x00\x00\x00\x00\x00#\x01\x00\x00\x01CS?`x\x01\x01\
                                 xC0S_\xA7+G\xADH\xC0B\x90\xEB\xF7`\xC2T\x80\x13\x1A#,>
Visualize the data with GeoServer (optional)
Setting up the GeoMesa HBase GeoServer plugin
Clone the GeoMesa source distribution:
$ git clone https://github.com/locationtech/geomesa.git
$ cd geomesa
and build it with the hbase profile:
$ mvn clean install -DskipTests -Phbase
Go into the built HBase GeoServer plugin module:
$ cd geomesa-hbase/geomesa-hbase-gs-plugin/target
and extract the contents of the
geomesa-hbase-gs-plugin_2.11-<version>-install.tar.gz file into
GeoServer’s WEB-INF/lib directory. This distribution does not
include the Hadoop or Zookeeper JARs; the following JARs should be
copied from the lib directory of your HBase or Hadoop installations
into GeoServer’s WEB-INF/lib directory:
- hadoop-annotations-2.5.1.jar
- hadoop-auth-2.5.1.jar
- hadoop-common-2.5.1.jar
- hadoop-mapreduce-client-core-2.5.1.jar
- hadoop-yarn-api-2.5.1.jar
- hadoop-yarn-common-2.5.1.jar
- zookeeper-3.4.6.jar
- commons-configuration-1.6.jar
Note: the versions may vary depending on your installation. In addition,
for Hadoop 2.6.0+, htrace-core-<version>.jar is also required.
The HBase data store requires the configuration file hbase-site.xml
to be on the classpath. This can be accomplished, for example in Tomcat,
by placing the file in WEB-INF/classes (you should create the
directory if it doesn’t exist). Restart GeoServer.
Register the GeoMesa store with GeoServer
Log into GeoServer using your user and password credentials. Click
“Stores” and “Add new Store”. Select the HBase (GeoMesa) vector data
source, and enter the following parameters.
workspacethis is dependent upon your GeoServer installationdata source namepick a sensible name, such as,geomesa_quick_startdescriptionthis is strictly decorative;GeoMesa quick startbigtable_table_namethe name of the table you specified on the command line
Click “Save”, and GeoServer will search your HBase table for any GeoMesa-managed feature types.
Publish the layer
GeoServer should recognize the QuickStart feature type, and should
present that as a layer that could be published. Click on the “Publish”
link.
You will be taken to the “Edit Layer” screen.
In the “Data” pane, enter values for the bounding boxes. In this case, you can click on the link to compute these values from the data.
Click on the “Save” button when you are done.
Take a look
Click on the “Layer Preview” link in the left-hand gutter. If you don’t see the quickstart layer on the first page of results, enter the name of the layer you just created into the search box, and press . Select the layer, and you should see a small square with a collection of red dots. (You may shift-click to highlight a region to zoom into). After zooming in your view should look something like this:
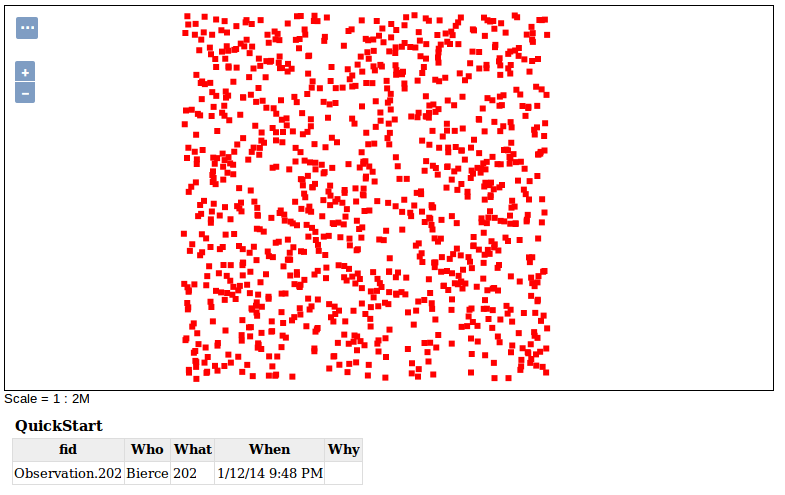
Visualizing quickstart data
Click on one of the red points in the display, and GeoServer should report a detailed record for the clicked point underneath the map area.
Click on the “Toggle options toolbar” icon in the upper-left corner of
the preview window. The right-hand side of the screen will include a
“Filter” text box. Enter Who = 'Bierce', and click “Apply”. The
display will now show only those points matching your filter criterion.
This is a CQL filter, which can be constructed in various ways to query our data. You can find more information about CQL from GeoServer’s CQL tutorial.